
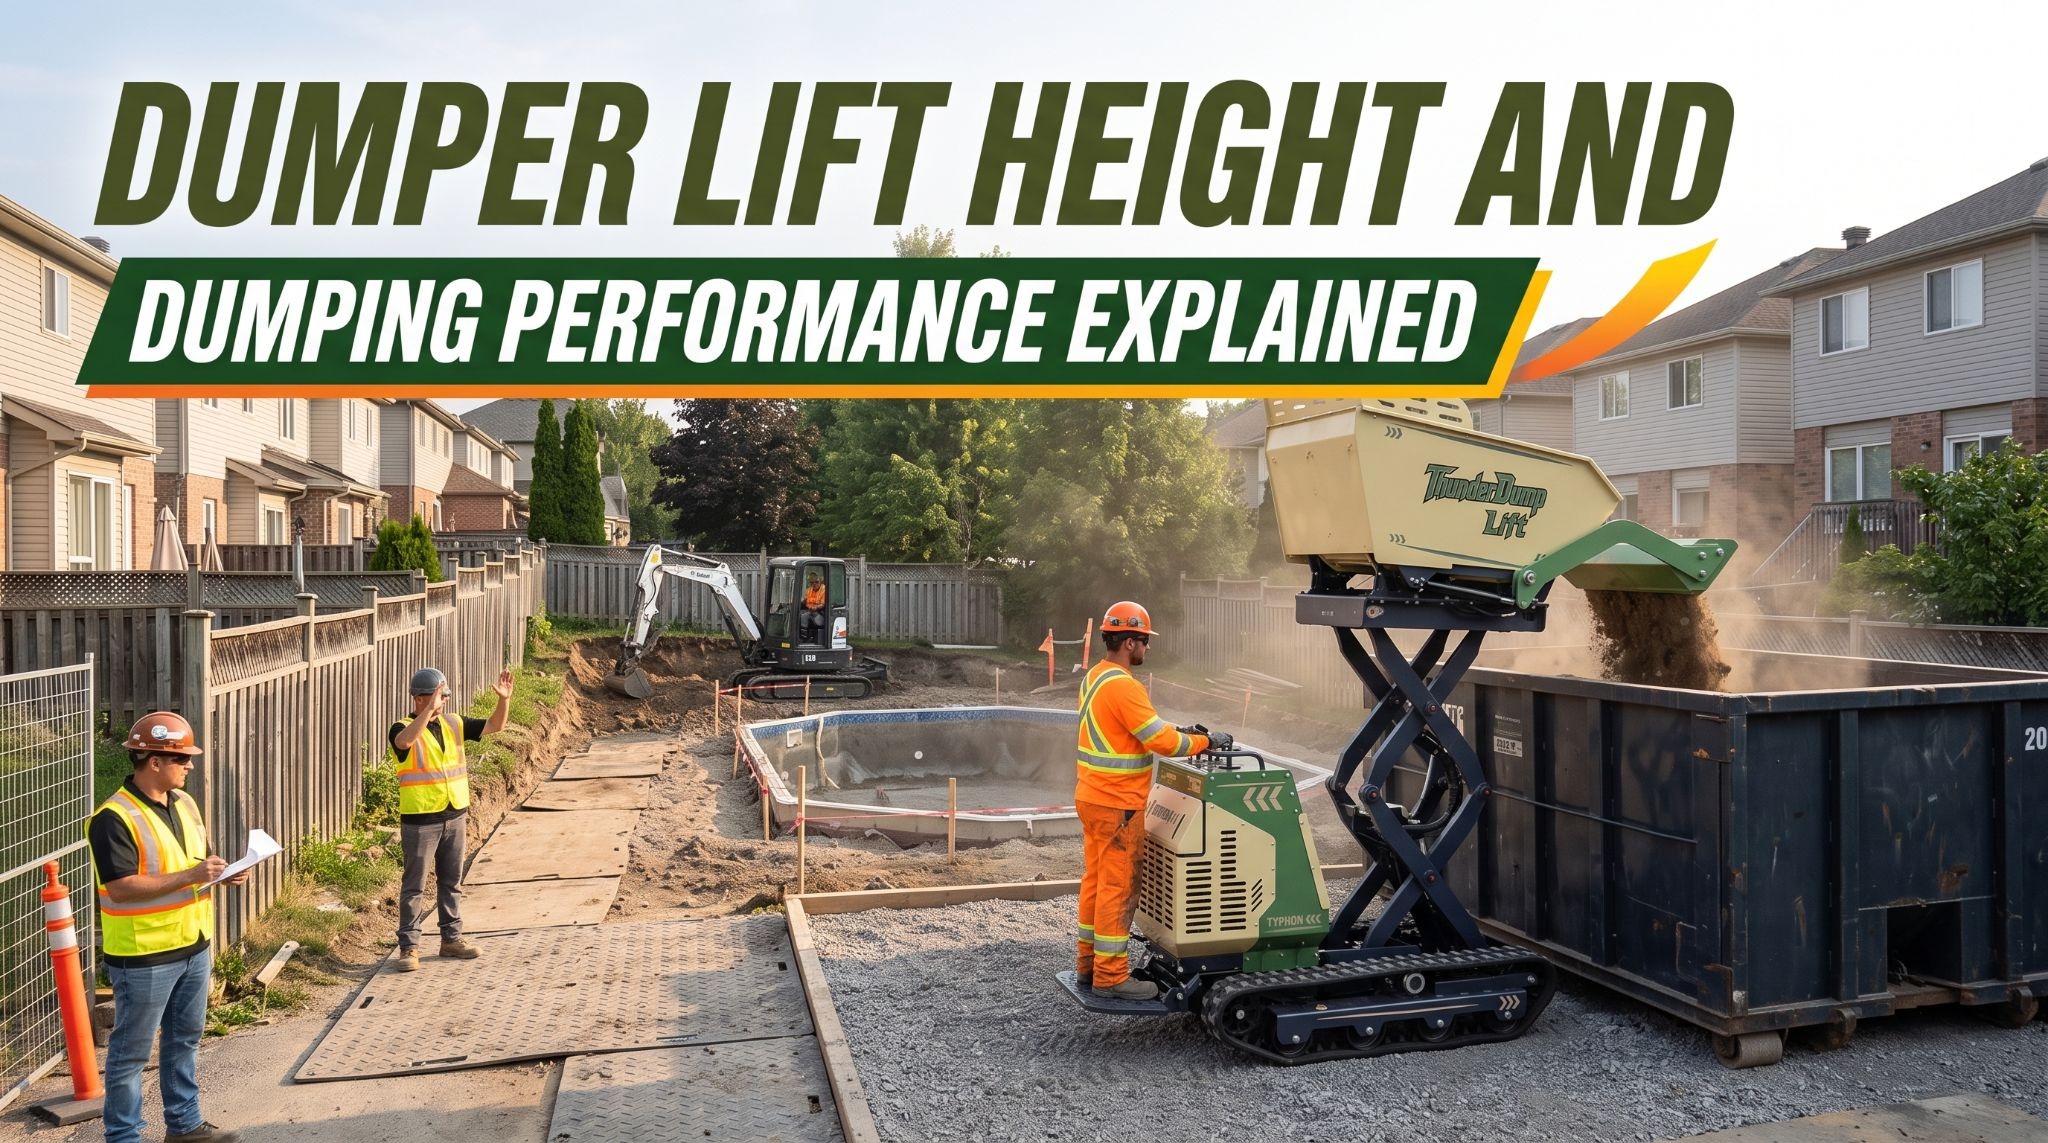
Dumper Lift Height and Dumping Performance Explained
Tracked dumpers move excavated soil, gravel, and other materials through confined construction sites where trucks cannot reach. Their ability to unload directly into containers, hoppers, or elevated stockpiles depends on more than the maximum height listed in a specification sheet. Insufficient clearance can cause spillage, while uneven ground, excessive loads, and material sticking inside the body can create delays and increase operating risks.
Discharge height, tipping angle, rated payload, hydraulic cylinder capacity, and body geometry all influence dumping performance. The height of the body pivot or lift mechanism may differ from the actual clearance at the discharge edge, so operators must verify the dimension that matches the receiving point. Wet clay and other cohesive materials can also cling to the body, making load distribution, suitable loading amounts, and approved release methods important to consistent unloading.
Reliable dumping starts with matching the machine to the required discharge height, material type, and site layout. A firm, level unloading area helps maintain stability, while payload limits and clear exclusion zones reduce the risk of overloading or placing people near a raised body. Regular checks of hydraulic hoses, cylinders, and safety props can help identify faults early and keep material handling efficient throughout the project.
Understanding Dumper Lift Height
Lift height describes how high the dump body, or a specified point on it, can rise during unloading. It’s one of the most important figures for any job that requires dumping into something rather than onto the ground, such as a roll-off container, a truck bed, a skip, or a receiving hopper. Yet it’s also one of the most commonly misunderstood specifications, because manufacturers don’t all measure it the same way.
Depending on the manufacturer and the machine’s design, a stated lift height may refer to the top of the raised body, the height of the body’s pivot point, or the height of the discharge edge, which is the lip where material actually leaves the body. Those points can differ by several inches or more. On high-tip dumpers, which raise the entire body vertically before tipping it, the difference between pivot height and discharge height can be especially significant. The figure that matters for clearing a container wall is the discharge height, often listed separately as the maximum discharge or dump height. Some manufacturers also list a dump clearance figure, which shows the space beneath the discharge edge when the body is fully tipped.
Read the technical specifications carefully before planning any job that depends on lift height, and confirm exactly which point each figure describes. When the spec sheet isn’t clear, ask the manufacturer or dealer. Then measure the receiving point on site. Check the wall height of the container, the side height of the truck bed, or the rim of the hopper, and allow clearance so material falls inside rather than sliding down the outside. Remember that a container placed on a slope or uneven ground may sit higher on one side.
Lift height also affects reach. On many dumpers, the discharge edge moves forward or sideways as the body rises, which determines how far material lands from the machine. Swivel-skip dumpers can rotate the body to discharge to the side, which helps along trenches and in narrow spaces. Consider how the dumper will approach the dump point and whether the discharge edge will reach the center of the receiving area from a safe, stable position.
Before raising the body, look up. A raised dump body can reach tree limbs, eaves, scaffolding, and overhead power lines. Maintain the clearance from overhead electrical lines required by applicable regulations, which in the United States is generally at least 10 feet for lines up to 50 kV.
Key takeaway: Check the manufacturer’s specifications to confirm whether the stated lift height refers to the body, pivot point, or discharge edge, and measure the receiving point on site so the discharge edge clears it with margin.
Ground Stability During Dumping
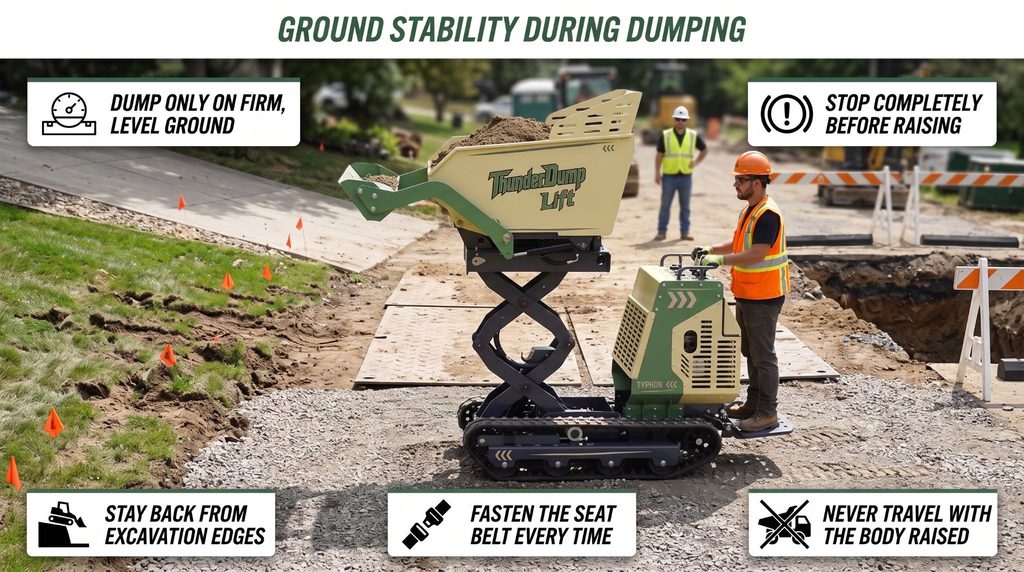
Raising a loaded dump body changes the machine’s center of gravity. As the body tips or lifts, the load’s weight moves upward and, depending on the design, forward or to the side. That shift makes the moment of dumping one of the least stable points in any dumper’s work cycle. Ground that feels firm enough for travel can become a hazard once a raised, loaded body is added to the equation.
Uneven, soft, or sloping ground increases that risk significantly. A machine dumping on a side slope leans further as the body rises, and the load’s weight amplifies the tilt. Soft soil can compress under one track or wheel, tilting the machine just as the body reaches full height. Fresh backfill, recently tilled ground, saturated soil, and areas near excavation edges are especially prone to giving way. High-tip dumpers, which raise the load well above the chassis, are particularly sensitive to these conditions.
Position the dumper on firm, level ground before raising the body. Follow the manufacturer’s dumping instructions, including any limits on slope, side slope, and body position. Where the dump point sits on soft or uneven ground, build a compacted gravel pad, lay ground protection mats, or move the receiving container to firmer ground. On sites where dumping on a slope can’t be avoided, follow the operator’s manual exactly, which may require facing a specific direction or reducing the load. Never raise the body where the machine cannot remain stable.
Operating habits support stability, too. Fasten the seat belt every time you operate, since the rollover protective structure only protects an operator who stays inside it. Come to a complete stop before raising the body, and never travel or turn with the body raised. Raise and lower the body smoothly, and watch the machine’s attitude as the body rises. If the machine begins to tilt, a track or wheel lifts, or the ground starts to settle, lower the body immediately and reassess.
Keep the area around the dump point clear. Workers on foot should stay well outside the discharge zone and away from the sides of the machine. Use a trained spotter when visibility is limited or when dumping near people, structures, or excavation edges. Reassess ground conditions after rain, freeze-thaw cycles, or heavy traffic, since a dump point that was firm in the morning may be soft by the afternoon.
Key takeaway: Raising a loaded body raises the machine’s center of gravity, so dump only on firm, level ground, follow the manufacturer’s dumping instructions, and never raise the body where the machine cannot remain stable.
Material Flow and Discharge Efficiency
Raising the body is only half of the dump. The load also has to leave the body cleanly and land where it’s intended. Material properties have a strong influence on how easily that happens, and a load that refuses to slide out can waste time, spill material, and create unsafe situations.
Moisture is the most common culprit. Wet clay, silty soil, and saturated topsoil become cohesive and sticky, clinging to the floor and corners of the dump body even at full tip angle. Particle size matters as well. Fine, damp material packs tightly, while coarse gravel and crushed stone generally flow freely. Cohesive materials, including clay, concrete slurry, and some recycled fines, tend to hold together as a mass and may release in a sudden slab rather than a steady stream. That sudden release can shift weight abruptly and jolt the machine.
Loading practices affect discharge just as much. Material dropped from height compacts into the body floor, making it harder to release. An uneven load can discharge from one side first, pulling the body off center. Heaped loads spill over the sides during travel and unloading, leaving material on the route and around the dump point.
Several practical steps improve discharge efficiency. Ask the loading operator to place material gently and evenly rather than dropping it from height. Keep wet, sticky material to moderate loads so it can slide out more easily. Clean the body regularly so dried buildup doesn’t create ridges that trap material. Where the manufacturer allows, a release coating or body liner can help sticky material slide out. On jobs with very wet soil, schedule hauling of the stickiest material for drier periods when practical.
When material stays in a raised body, resist the urge to jerk the controls or bounce the machine to shake it loose. Those actions shock the lifting system and can destabilize the machine, especially with the body fully raised. Instead, lower the body, move to a stable position, and remove the remaining material with a shovel or scraper, but only with the body fully lowered or secured with the manufacturer’s mechanical safety support. Never climb into or reach under a raised body to dislodge material.
Plan the dump point to support clean discharge. Approach squarely, stop in the correct position before raising the body, and keep workers well clear of the discharge area. Near excavations, trenches, and embankments, use wheel stops or a berm and keep the machine back from the edge, since the added weight at the moment of dumping can cause the ground to give way.
Key takeaway: Moisture, particle size, and cohesion affect how easily a load leaves the body, so load evenly, avoid compacting sticky material, keep bodies clean, and never shake or reach under a raised body to clear stuck material.
Inspection and Maintenance of the Lift System
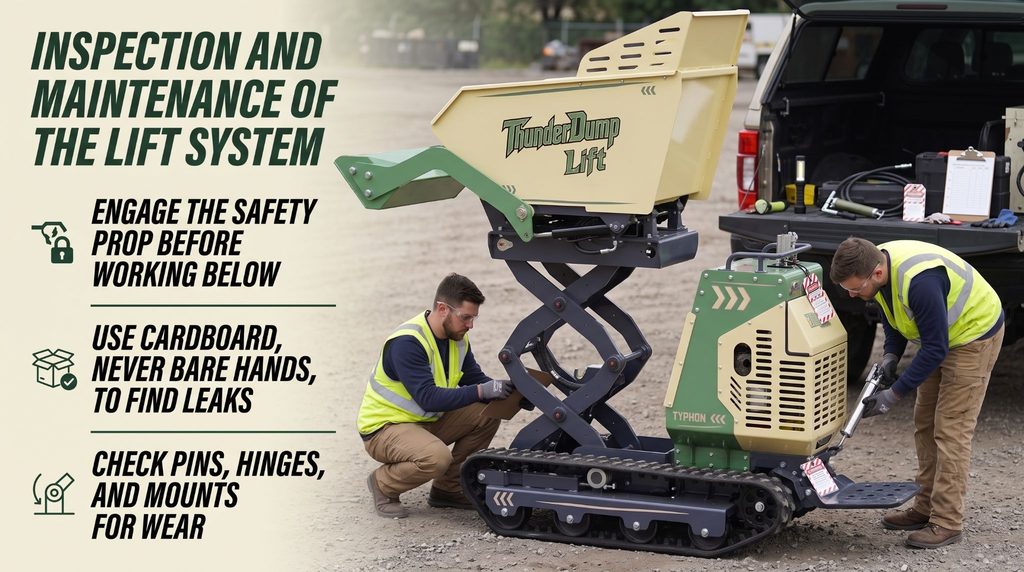
The lift system works hard on every load, raising heavy material hundreds of times per week in dust, mud, and changing weather. Regular inspection and maintenance keep it lifting smoothly, holding position reliably, and lowering under control. They also catch developing problems before a hose bursts or a pin fails with a load in the air.
Begin every inspection with the machine parked on firm, level ground, the body fully lowered, the engine off, and the key removed. If any part of the inspection requires the body to be raised, secure it first with the manufacturer’s specified mechanical safety support, often a body prop or safety strut. Never work beneath a raised dump body supported only by hydraulic pressure, since a hose failure, valve leak, or accidental control movement could bring it down without warning.
Inspect the hydraulic cylinders for scoring, nicks, pitting, and bends on the rods, and look for fresh oil or a dust-caked ring around each gland that signals a slow leak. Examine every hose for cracks, abrasion, bulges, and kinks, paying close attention to areas where hoses flex as the body moves or pass near brackets and the chassis. Check fittings for dampness and loose connections. Never search for a hydraulic leak by running your hand along a hose. Pressurized fluid can penetrate skin and cause serious injury that requires immediate medical attention, so use a piece of cardboard instead, and wear gloves and eye protection.
Check pivot pins, hinges, and bushings for excessive play, missing retainers, and signs of wear such as fresh metal shavings or elongated holes. Inspect cylinder mounting points and body brackets for cracks and damaged welds, particularly after heavy or uneven loads. Grease every pivot point according to the manufacturer’s schedule, wiping each fitting clean first so dirt isn’t pumped into the joint.
Test the controls as part of every pre-shift check. With the area clear, raise the empty body through its full range and lower it again. Movement should be smooth and steady, and the body should hold position when the control returns to neutral. Confirm that any swivel function, safety interlocks, and warning devices work as designed. Check hydraulic fluid level and condition according to the manufacturer’s procedure.
Keep the lifting system maintained according to the manufacturer’s schedule, including fluid and filter changes and periodic inspection of pins and bushings. Record every inspection, repair, and part replacement in a maintenance log with the date and hour meter reading. If you find a leak, drift, crack, or control problem, tag the machine out of service and keep the key under control until a qualified technician completes the repair.
Key takeaway: Inspect cylinders, hoses, pivot pins, hinges, mounting points, and controls for leaks, damage, or wear according to the manufacturer’s schedule, and never work beneath a raised dump body unless it’s secured with the specified mechanical safety support.
Conclusion
Dumper lift height and dumping performance shape how efficiently and safely material moves from the loading point to its final destination, and the best results come from understanding every factor that affects the dump. Knowing whether a stated lift height refers to the body, pivot point, or discharge edge, and measuring the receiving point on site, ensures material lands inside the container, truck, or hopper instead of on the ground beside it. A well-maintained hydraulic lifting mechanism, operated with smooth control movements, raises and lowers the body consistently and holds it securely. Keeping loads within rated payload, with attention to material density and moisture, protects the lifting system and preserves stability, while even loading and clean bodies help sticky material discharge completely. Firm, level ground at the dump point keeps the machine stable as its center of gravity rises, and routine inspection of cylinders, hoses, pins, hinges, and controls keeps the lift system dependable from shift to shift.
When you match discharge height to the job and follow safe dumping procedures, you move more material with less spillage, less downtime, and lower operating risk, delivering the clean, on-schedule results your customers expect. Before your next hauling job, confirm the discharge height against your receiving point, check the payload against the day’s materials, prepare a firm and level dump point, and complete a full inspection of the lift system so your dumper performs reliably from the first load to the last.
Frequently Asked Questions
What does dumper lift height mean?
Dumper lift height refers to the specified height reached by the dump body or its discharge point when raised for unloading. This measurement helps determine whether the machine can discharge material into a truck, container, or designated collection area. However, manufacturers may measure lift height from different reference points, such as the body, pivot point, or discharge edge. Check the technical specifications to confirm the measurement and compare it with the required clearance at your jobsite before selecting a dumper.
Does greater lift height mean better dumping performance?
Not necessarily. Dumping performance also depends on payload capacity, material flow, hydraulic capability, discharge clearance, and ground conditions. A higher lift height may help discharge material into taller containers, but it does not guarantee faster or more complete unloading. Raising the dump body also raises the machine’s center of gravity, making stable ground and proper loading especially important. Operators should follow the manufacturer’s operating limits and avoid raising the body on unsuitable slopes or unstable surfaces.
Why can material remain inside a raised dump body?
Wet or cohesive materials, such as clay and damp soil, may stick to the dump body and prevent complete discharge. Uneven loading, compacted material, and dried buildup can also interfere with material flow. Distribute loads evenly, avoid unnecessary compaction, and clean the body according to the manufacturer’s instructions. If material remains stuck, lower the body and follow the approved clearing procedure. Never shake the machine to release material or reach beneath a raised body, as these actions can create serious crushing and stability hazards.
What should operators check before dumping?
Before dumping, confirm that the load is within the machine’s rated capacity and inspect the discharge area for workers, obstacles, and overhead hazards. Ensure the ground is firm, stable, and sufficiently level for the operation, and verify that the hydraulic lifting system works correctly. Position the dumper appropriately and come to a complete stop before raising the body. Keep workers clear of the discharge zone, and lower the body fully before moving away. Always follow the manufacturer’s operating instructions and site safety procedures.